


10 Tips for Storing Water for An Emergency
I’ll never cop to being a hardcore Prepper–I’m too paranoid to sink my full set of teeth into that scene. I do, however, find so much sense in being prepared for whatever type of disaster that might befall us where we live. Regardless of what disaster is in play, storing water for an emergency is simply a smart thing to do.

The general consensus of how much water is needed per person...View More
The general consensus of how much water is needed per person...View More


B.I.G. Tip of the Day!
Solar light attached to upside down clay pot adds inexpensive lighting to your porch and yard! Great for camping!!

Baby Goat Plays On Pig In Amazing Viral Video
You may have heard the old saying, "Pigging ain't easy." Or maybe you haven't. Either way, this pig is just trying to take a nap, and his little goat buddy won't let him. Luckily for us, the footage here is just adorable.


How And Where To Drill A Water Well On Your Land

Sponsored Link
If you have (or are considering purchasing) land without a water well, it’s worth doing some research to determine if you want to save the expense of having a well professionally installed. The video below explains how to locate and where to drill your well. You also can click here for another video that explains how to drill well by hand. If you’re serious about drilling your own well, consider reading the book Waterhole: How To Dig Your Own Well.


Knowledge Weighs Nothing

Even Simpler Vertical Gardening Method!
http://
This is cheaper and way, way easier than the vertical barrel method we posted about last week.
I think this method is superior in every way. Find out more...
WINTER VEGETABLE GARDENING The Garden Survives a Record-Breaking January
There’s a saying out there that all gardeners are optimists; if that’s true, then winter gardeners are down-right Pollyannaish. Truly, how can I be anything but an optimistic soul after seeing how well my garden has come through this record-breaking winter?! Again, I’m using no greenhouse, no heat, no expensive structures… just low tunnels (waist-high hoops covered with fabric or clear plastic) and cold-hardy plants.

Read More: http://www.motherofahubbard.com/garden-survives-record-cold/
Read More: http://www.motherofahubbard.com/garden-survives-record-cold/
Battery Maintenance: The Heart of Sustainable Power For Your Home

Batteries are the heart of sustainable power for your home. Without proper battery maintenance, you will have system failures. When you live off-grid, you are the power company, water company and communications provider. The great news is that if there is a power outage in the nearby city, we would never know it. The bad news is that if we have a power outage, it is our responsibility to fix it.
Read More: http://www.grit.com/tools/technology/battery-maintenance-the-heart-of-sustainable-power-for-your-home.aspx

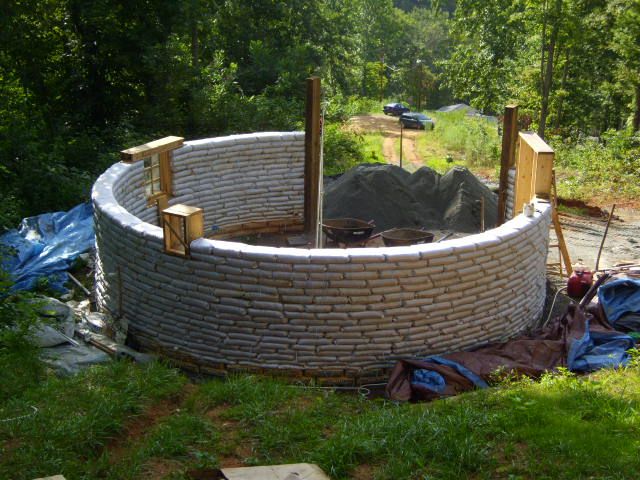
An Earthbag Round House

Starting on the rubble trench foundation. Railroad ballast was used for the rubble.
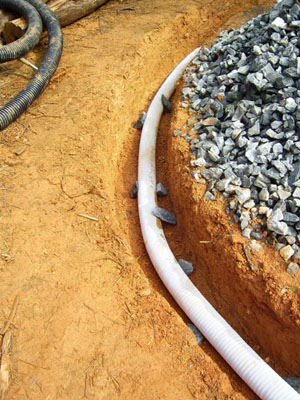
The drainage pipe in place. A layer of pea gravel goes over the railroad ballast.
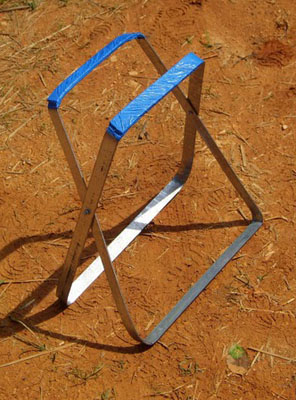
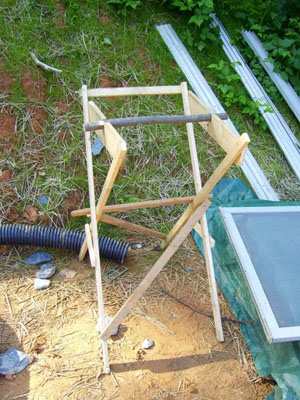
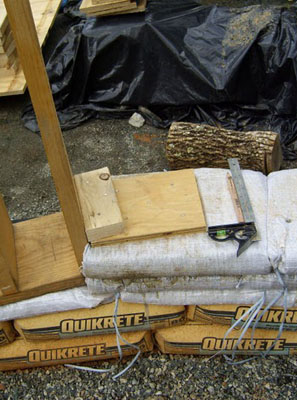
Homemade bag stand to put bags on while you're filling them and barbed wire stand.
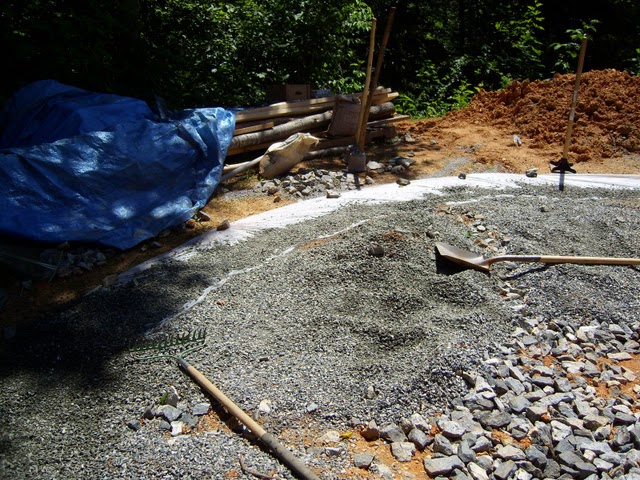
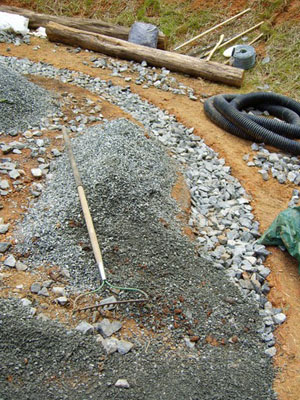
Covering over our sediment fabric with pea gravel.
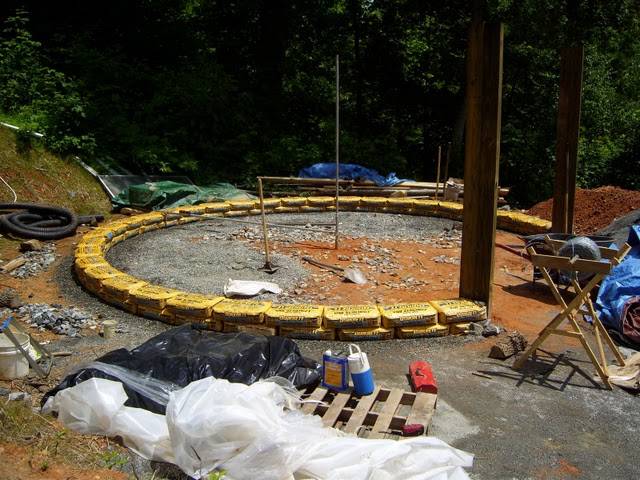
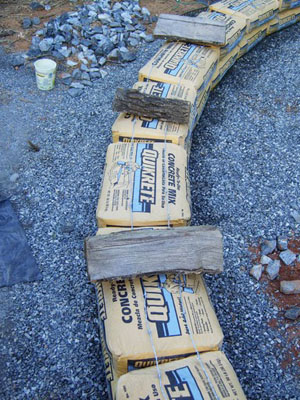
Our first and second rows of stem wall - 80 lb sack concrete. 2 strands of barbed wire go between every row. The thing in the middle is our building, compass, made from chain link parts, used to keep the walls round and level.
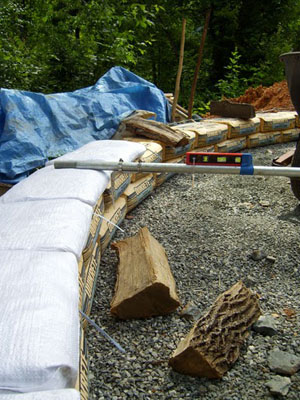
Firewood used to hold the barbed wire in place. The row of gravel bags going on. When tamped, they are about 2 inches thick.

Door frame up. The bottom layer of bags is double bags filled with gravel to keep water from wicking up into the walls.
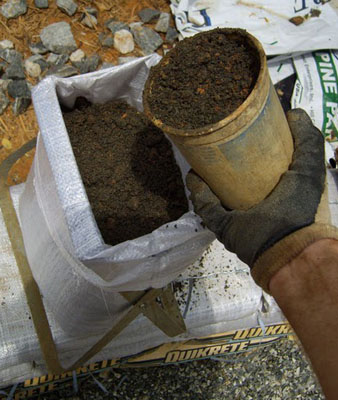
A strip anchor to hold the door in place. Filling a bag with a mix of clay soil from on-site and "screenings" from a gravel quarry.
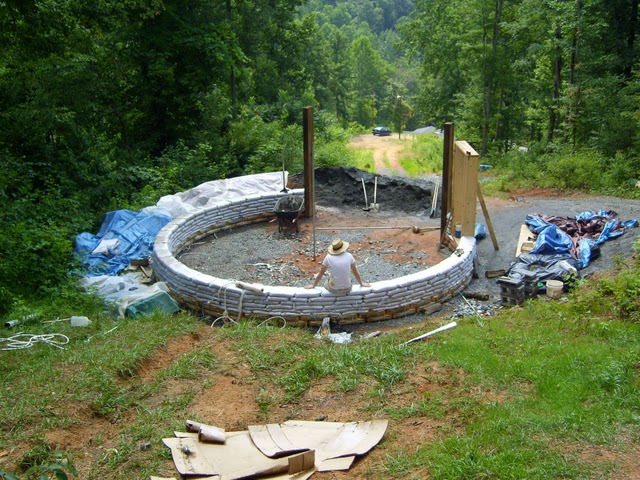
Surveying my kingdom.
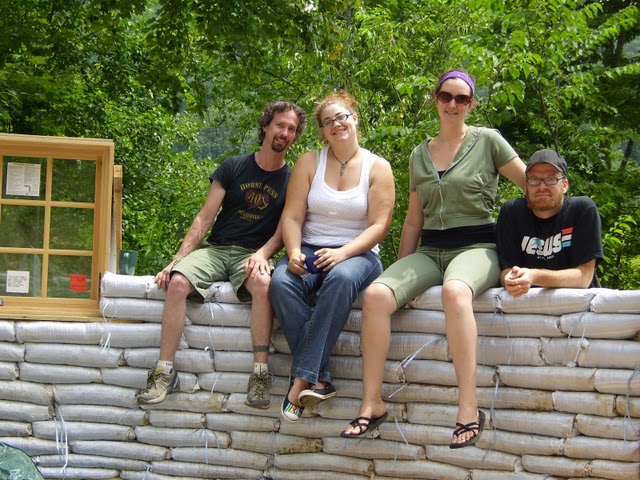
This is how far we got by the end of the building party. Not too shabby, eh?
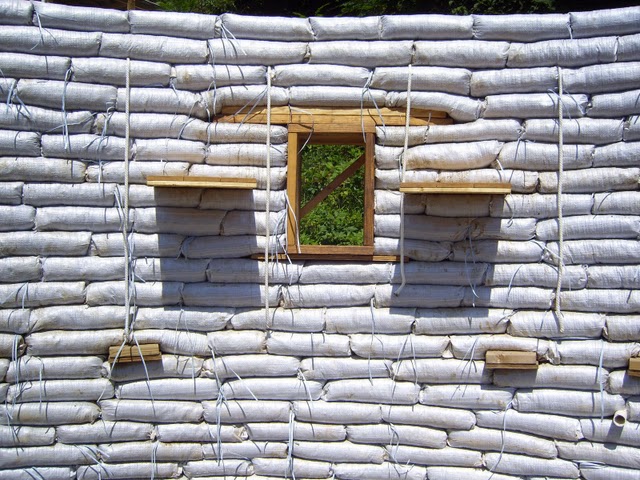
The little window near the camera will also be a cold storage in the winter. Note our first lintel over a window in back. This keeps the wall stable over an "open" area such as a door or window.

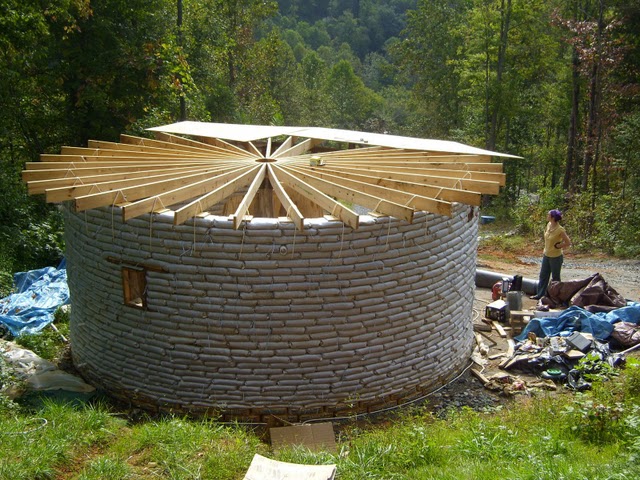
Ropes in the wall are to tie down joists when we put the roof on. Note flue through which stove pipe will exit the wall.
Shelves next to northern window/cold storage. This is where the kitchen will be.
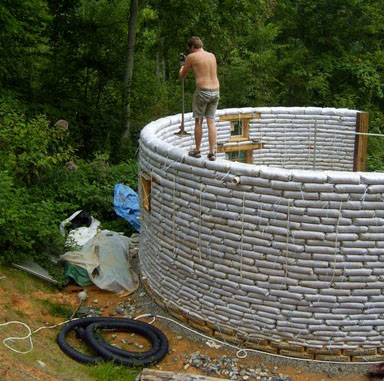
Tamping the wall. Yeah, that's way up there. Two more rows will finish the bag wall.

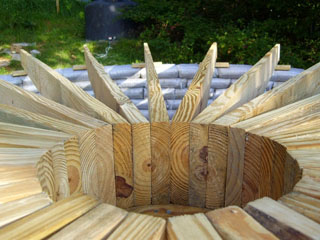
Center post. Locust wood.
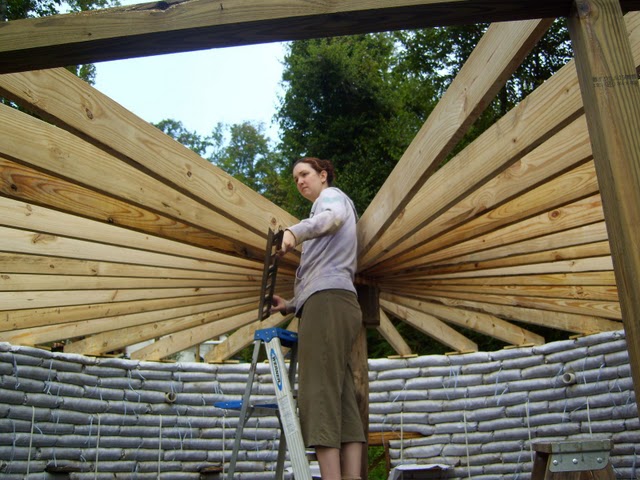
Putting up joists.
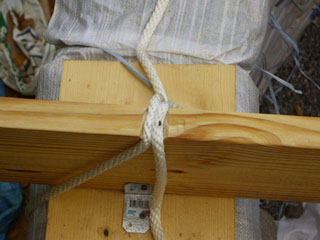
Nail through ropes holds tighter than tieing.
Plywood goes on.
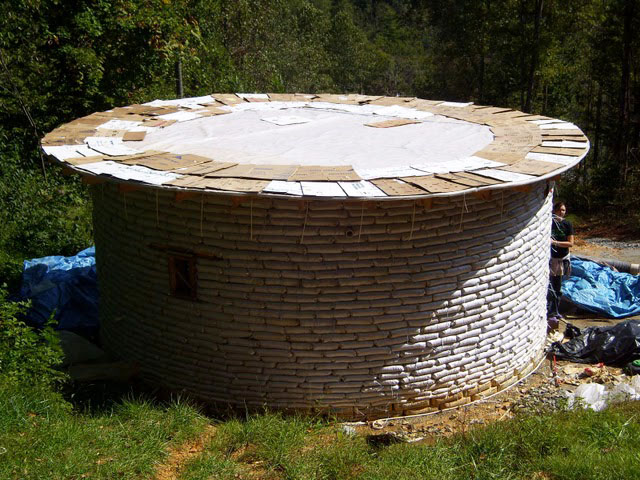
First roof layer - 6 mil poly. Water proof tape to join sheets. We also put silicone caulk to help seal it. Cardboard layer (for a little extra insulation).
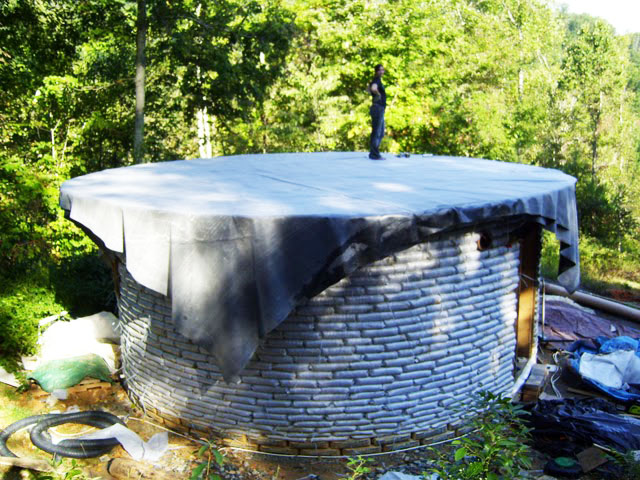
EPDM is going on. 4-6 inches of straw were placed over the EPDM and hopefully this will eventually become a living roof.
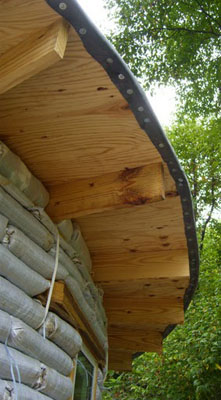
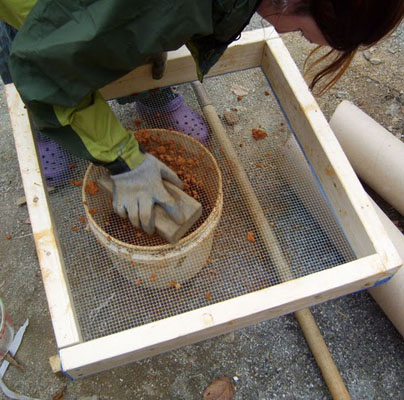
Drip edge. Works perfectly. MJ sifting clay.
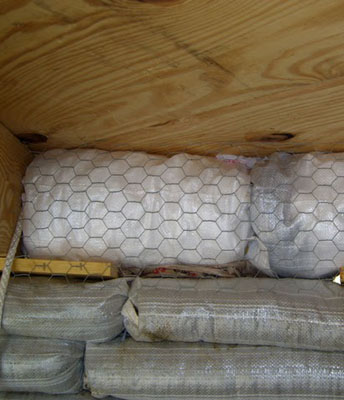
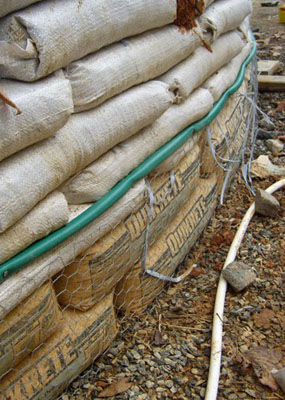
Styrofoam (saved from dumpsters) bags sealing between joists with chicken wire for plaster over them. Hose separates earth and cement plaster. Cement wicks water up.

Our neighbor, JD, had done a lot of plastering and showed us a really quick way to put it on with a trowel.
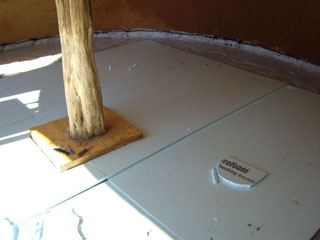
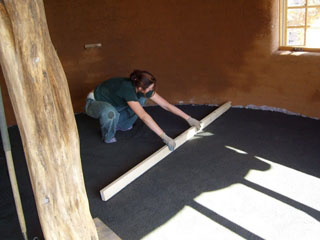
Floor insulation over 6 mil poly. Spreading sand to level it.
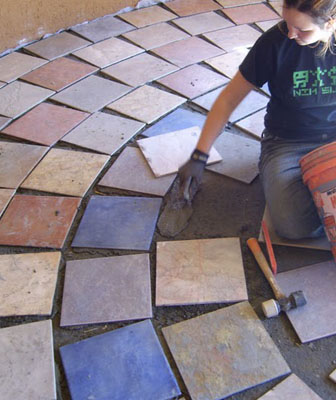
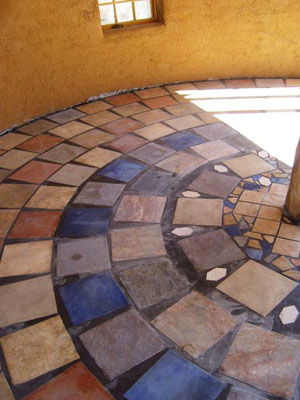
Cementing under the tiles. The finished floor - it's beautiful and tough.
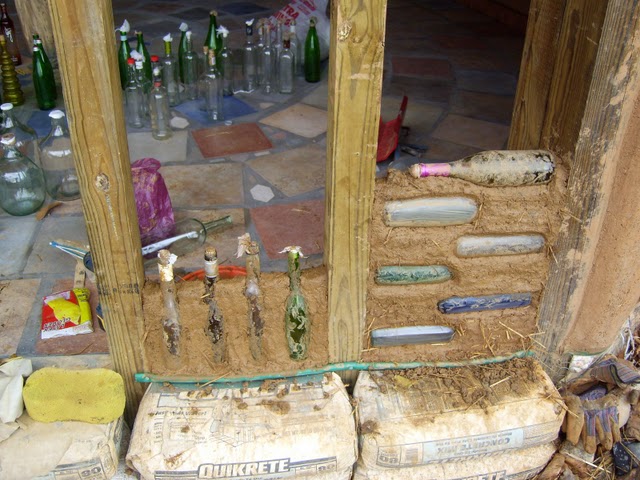
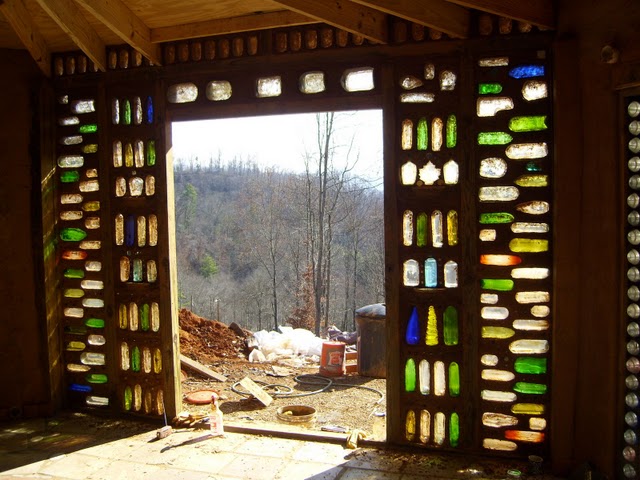
Bottle wall done!
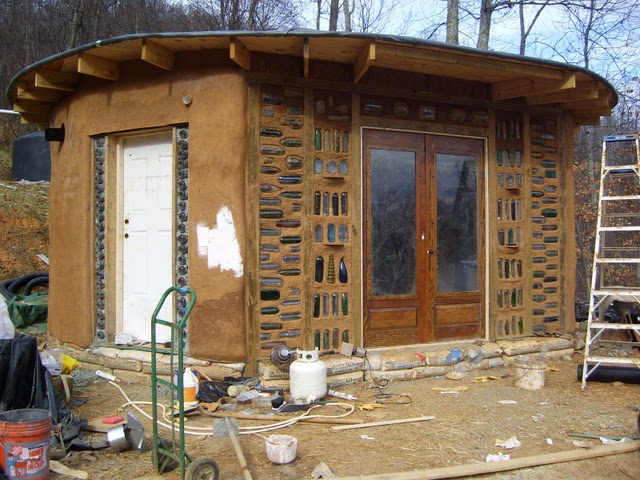
Almost ready to move in. We are adding a layer of perlite plaster (clay soil mixed with perlite) over the top of the old plaster for insulation, which we will paint with lime paint when we're done to help reflect solar gain.

Lime washes applied. It is moisture resistant and lets the walls "breathe".
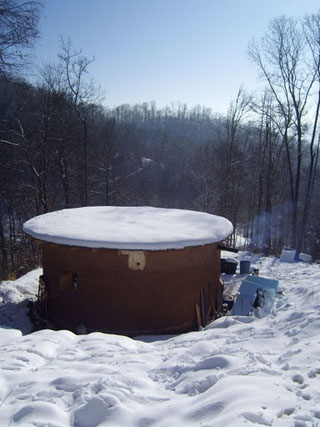
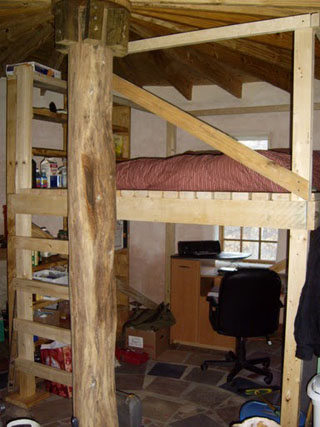
Our house was looking rather like a cupcake. The loft in all of its glory with a queen sized futon on top and office underneath.
(http://www.earthbagbuilding.com/projects/roundhouse.htm)
Subscribe to:
Posts (Atom)