


Yes, with a pile of old pallets, less than $100 and a bit of work, we built this really cool smokehouse. 3′ x 3′, it is big enough to smoke a whole animal, or at least a few big trays of meat plus some links of sausage.
I love this project – It still amazes me what you can build with repurposed wood and how great it looks. We really wanted to make a big DIY smoker, but most of the plans we looked that showed you how to build a smokehouse were too small and/or they called for using quite a bit of expensive materials. We never found plans that really met our requirements, so we ended up making our own.
Our considerations for DIY smoker plans were:
- Size - it needed to be big enough to a lot of items at once and also smoke large items
- Cost- it needed to be as inexpensive as possible while still allowing you to smoke meat well
- Skill level required – it needed to be something you could do with basic woodworking knowledge
I don’t know if you have ever smoked meat before, but it is a rewarding, yet time consuming task. Since your meat will be preserved, and therefore good for a long time, it makes the most sense to be able to smoke a lot at once. After determining how much wood we needed for a decent size smoker, we decided to go with repurposed pallets. For less than $100, we were able to put together this great smokehouse that can hold a ton of meat. Multiple racks for smoking as well as a place to hang sausages, you can even hang a whole deer in it if you like.
Here are the supplies you need to get started and the instructions and video for this cool project:
How to Build A Smokehouse:
- 20-30 pallets, deconstructed (need pallets? read this post about finding free pallets and this post about finding the safest pallets to use for your project)
- 2 1/2 inch screws *you should choose a good outdoor screw, we used plastic coated decking screws
- 1 1/4 inch screws
- aluminum flashing
- corrugated tin for roof (4′x3′) *this must be raw metal, not galvanized
- heavyduty tin foil
- roll of aluminum screen
- handle (for door)
- hinges (3)
Tools You Will Need to Build A Smokehouse:
- Reciprocal saw with a Bimetal blade (used to take pallets apart)
- Drill gun, preferably a cordless one
- Drill bits 1/8 bit and countersink bit
- Measuring tape
- Metal/tin snips
- Utility knife
- Skill saw or table saw
- Staple Gun
- Safety Glasses
- Work Gloves

DIY smoker: Supplies and tools you will need for the project

Deconstructed pallet pieces, cut to size, aluminum mesh screen and corrugated tin for roof.
(Only use raw metal, not galvanized.)
(Only use raw metal, not galvanized.)

Pictured are the deconstructed pallet pieces, both the pallet panels (shown on left) and the 2×4 pieces of pallet, all cut using the dimensions in our cuts list.
Check out our project videos for this DIY Smokehouse:
How To Build a DIY Smoker
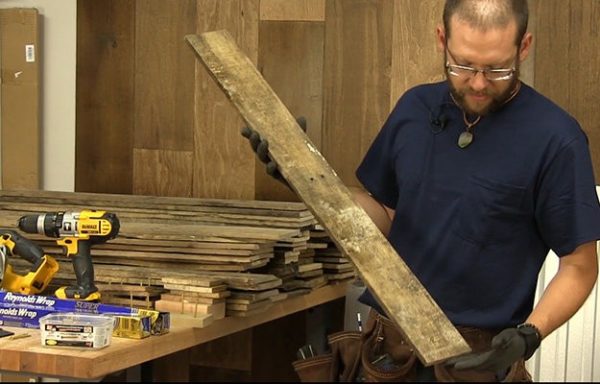
Step 1 : Select Your Pallets and Deconstruct Them
There are a few challenges when you use free, repurposed materials. The wood you get is not consistent, often very dry, sometimes warped. It splits easily. It is far from perfect, but it is free. You will need 20-30 pallets for this project. We recommend you spend some time looking for ones without too many broken slats and without wood that is too visibly warped. It is fine if you do not do this or are not able to find perfect pallets (those do not exist) You wood may be a little warped, but that is fine. Your smokehouse will not be perfect, but it will smoke meat. You will want to get a few more pallets than you think you need in order to get the best materials. Pallets usually range from 42″-48″ and 3′x3′ design should allow you to build this when you use pallets in this size range. The 2x4s in most pallets are typically 4′ – 5′ long and they have cutouts for a forklift. The cutouts are fine. If you need to, you can sister two boards together, which we explain further in our DIY Smoker Video.

Pallets come in many shapes and sizes. Each one is little bit different, and some are in better shape than others.
Where To Get Pallets? Check out our article: Where To Get Free Pallets and Reclaimed Wood
How To Know If Your Pallets Are Safe ? How To Tell If A Pallet Is Safe To Use
Deconstruct your pallets. We recommend you use a reciprocal saw with a bimetal blade that cuts through nails to do this. Trust me, this is the easiest way. View our tutorial and video on The Easy Way To Deconstruct A Pallet for step by step instructions.

A reciprocal saw with a bimetal blade makes pallet disassembly much less work than a pry bar.

You place the blade under each slat and cut, leaving you with the 2×4 planks that are between the slats.
Step 2 : Cut Clean Ends on Board and Make Cuts Below
Once you have your pallets deconstructed, you need to make your cuts. Start by making clean cuts on the ends of all your pallet boards. You should only need to remove a little bit. We chose our 3′ design to accommodate for this loss of wood from your pallets.
CUTS LIST
Cut these from 2x4s
(Part 1) 2 top braces front and back @ 33”
(Part 2) Door frame 2 pieces @ 70”
(Part 3) Door frame 2 pieces @ 29”
(Part 4) Wall frame front 2 pieces @ 6’
(Part 5) Wall frame back 2 pieces @ 5’ 6”
(Part 6) Back frame 2 pieces @ 5’4” 1×1
(Part 7) Shelf supports 8 pieces @ 33”
(Part 8) Shelf frames 8 pieces @ 32 ¾”
(Part 9) And 8 pieces @ 30 ½ “
Cut these from Pallet Panels
(Part 10) Left side @ 36 ¼ “
(Part 11) Right side @ 34 ½ “
(Part 12) Door @ 35 ¾”
(Part 13) Back @ 35 ¾”
(Part 14) Roof @ 38”
(Part 15) Vent covers 2 pieces @ 18” to 24”
(Part 16) Bottom front brace 1 piece @ 36”
Corrugated Metal roof 4’x3’

You will want to make clean cuts on the ends of your pallet boards. You should not need to cut too much off the ends.
When you remove the split ends of the wood, you should have a clean cut that looks like this.
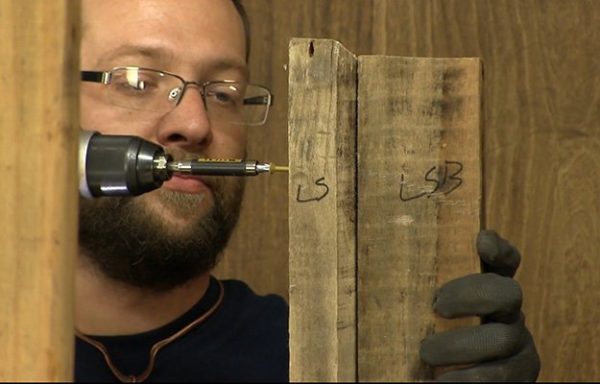
PREDRILL AND COUNTERSINK SCREWS:
Depending on the condition of your wood you may need to pre-drill and counter sink ALL screws to ensure the wood does not crack. We highly recommend you do this when using repurposed wood.
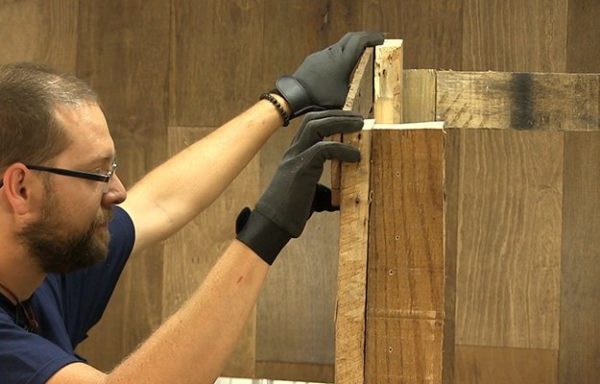
Step 3 : Layout and secure racks and frame for left and right sides
You will be making two sides frames here that also have cross pieces that will hold your racks. This DIY smoker utilizes a neat design – the racks make the structure itself, and you can even easily adjust the rack heights in the design. The parts that hold the racks in place end up being the ribbing that holds the frame in place. We marked ours at 24″, 36″, 44″and 52″ so we could place bigger meats close to the fire and smaller meats further away. You can even add hooks at the top for sausage if you allow enough room to hang. The only important consideration is your firebox, which we set at 24″ NOTE: Make sure your fire box fits under the 24” bracing. Adjust your shelves as needed. These measurements are not set and can be placed at any useable height as long as you allow ample room for your firebox.
Assemble and secure:
Take one each of (part 4- Wall frame front, 6’)and (part 5 – Wall frame back , 5’ 6”) square the bottoms, and secure 4 pieces of (part 7- Shelf Support, 33″) at 24”, 36” 44” and 52” When securing parts 7 to part 5, leave a 1 ½” gap for part 6. You will repeat these same steps for the second side, leaving you with the frame for the right and left side of your smoker.

Measure and mark part 4 and part 5 at 24″, 36″, 44″ and 52″ These measurements are adjustable if you wish your shelves to be at different heights than this.
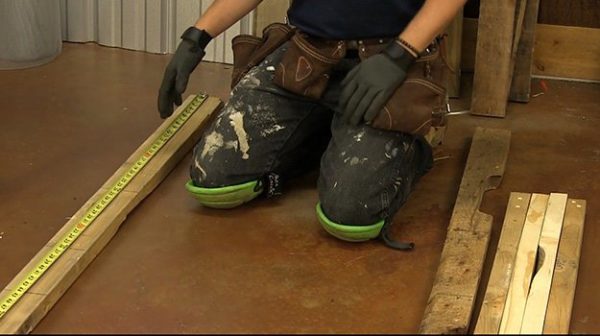
Lay out one each of parts 4 and part 5, then mark your measurements one both at 24″, 36″, 44″ and 52″

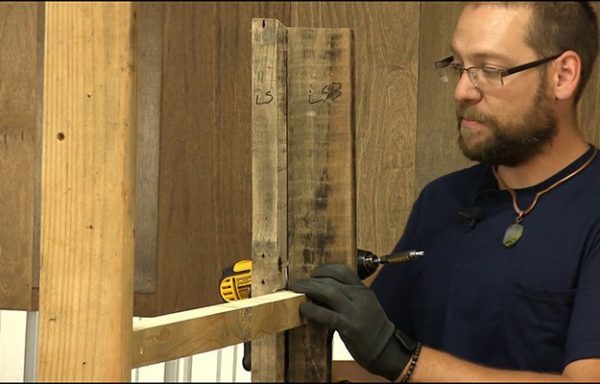
You will secure your shelf supports (part 7, 4 pieces, 33″ for each side) at the four measurements you marked.
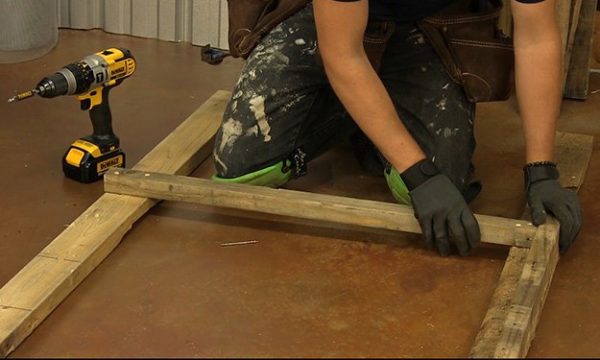
You will want to square up the ends to make sure your racks and your smoker is level.

Your will attach four shelf supports (part 7, 33″) to each side

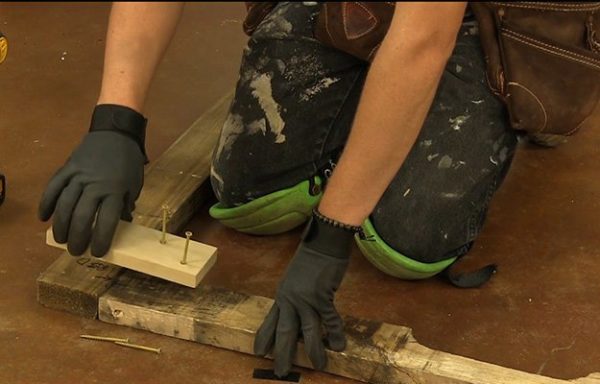
We countersinked our screws before attaching these pieces. We highly recommend you do this so your wood will not split.
Step 4: Build frame for door
Take parts 2 and 3 (part 2 – Door frame, 2 pieces @ 70”) and (part 3 – Door frame, 2 pieces @ 29”) and screw them together to create door. We used a homemade jig so we could easily get our screws in at an angle. Use four screws on each corner.

Take two of your 70″ pieces (part 2) and two of your 29″ pieces (part 3) and screw them together to make your door.
We used a homemade jig to get our screws in at an angle on the frame.

The jig allows us to get the screws in at an angle. Use four screws on each side.

Our finished door frame looks like this.
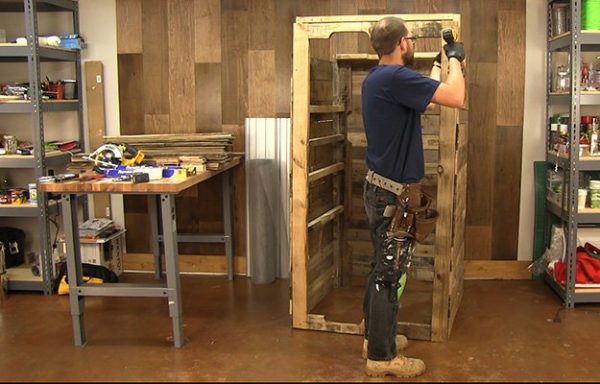
Step 5: Stand sides and door up, then secure
Stand the walls and door together and temporarily screw the door to the face of the walls so you can hold them together.
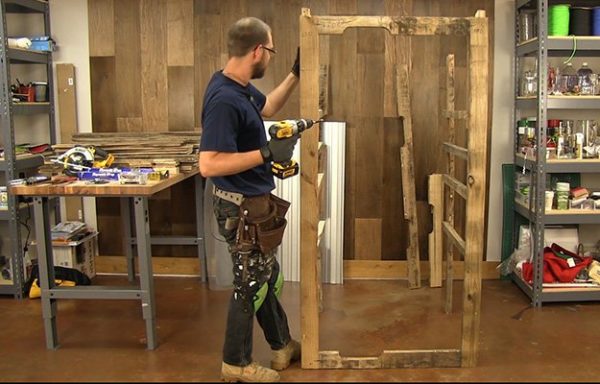
Temporarily screw the door to the frame so you can hold it together.
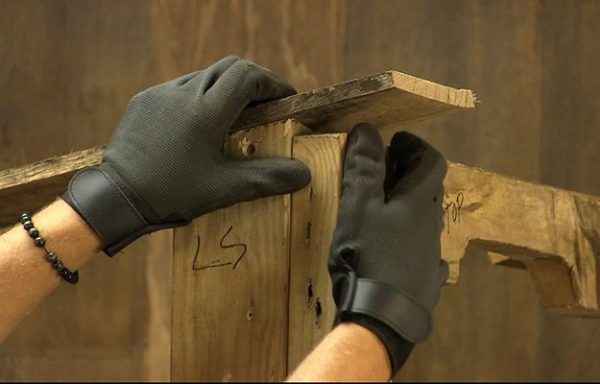
Step 6 : Cut angle for roof
Using a piece of panel, set against the top of the left and right wall, draw a line to create the angle for the pitch of the roof, and cut off excess to create the pitch of the roof.
Use a piece of panel to draw a line for the angle of the roof. Cut along this line on both sides, making them even.
Step 7:
Screw in part 1 (part 1 – two (2) top braces for front and back @ 33”) at the top of the walls front and back.

Attach part 1 (2 top braces for front and back, 33″) to the top of the wall, along the angle you cut in step 5.
Step 8 :
Add in part 6 (part 6- Back frame 2 pieces @ 5’4” 1×1) to the back of the frame, screw into part 5 (Wall Frame Back).
Place the back frame piece (part 6) next to the back of the wall frame(part 5) like this.
Secure back frame piece (part 5 ) to wall frame (part 6 )with screws.
Step 9 : Add paneling
Paneling. Add the back paneling first from the ground up. Repeat for the right and left sides.
Remove door from frame. Screw in hinges and re-hang the door. Leave at least a ½” gap at the base of the door.
Add paneling to door, then add paneling to roof last.
NOTE: Right side is shorter so that hinges have space to rotate. Also, Left side is longer so the door sits inside the paneling.

Starting from the ground up, add your paneling to the sides of the smoker.

Continue adding paneling until you get to the top.
Repeat and add paneling to other side.
Step 10 : Attach wood for roof
Screw roofing materials (part 14 Roof @ 38”) onto top to make roof.
Place roofing boards (part 14) on top and secure with screws.
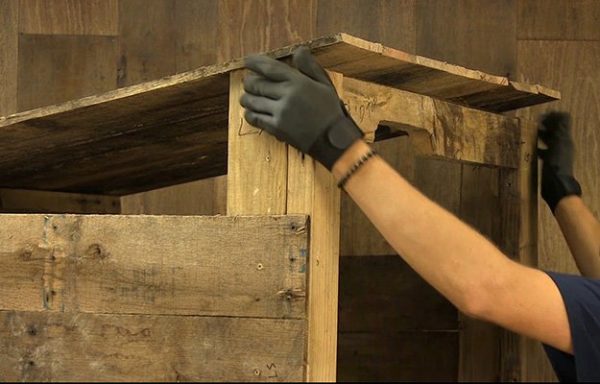
Screw the roofing materials onto the roof so they look like this.
Step 11 : Finish door
Put door frame back in place. Attach hinges to one side of door frame. Add pallet panels to door. Attach handle to front of door on opposite side from hinges.

Attach your door frame to the smoker and add hinges on one side.

Starting at the bottom, attach the pallet panels to the door.

Continue attaching the pallet panels to the door like this.
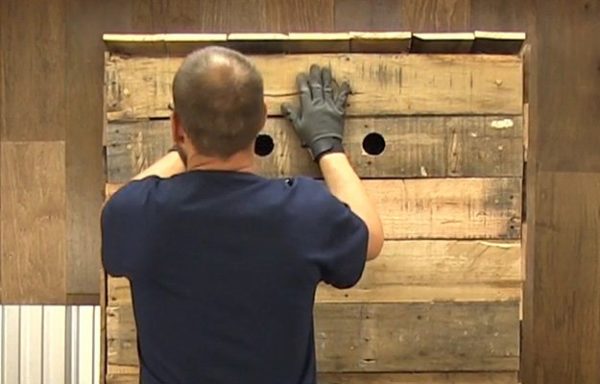
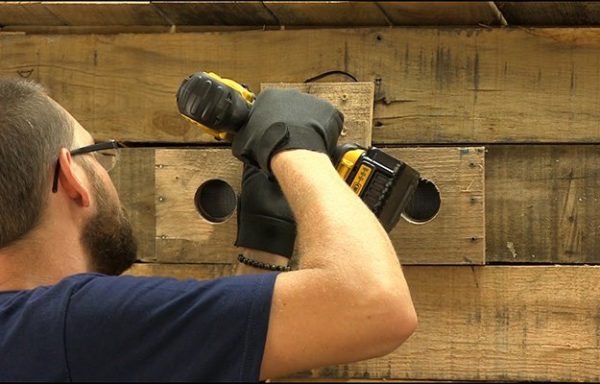
Attach panels until you get to the top. In this photo, we have already drilled the vent holes.

Attach your handle to the door on the side opposite from the hinges.
Step 12 : Construct racks
Screw rack parts together. (part 8 – Shelf frames 8 pieces @ 32 ¾”) Staple screen onto rack. Once you have two sides stapled, be sure to pull the screen tight as you staple the other two sides.

Screw the pieces for the rack frames (part 8,) together to make your smoking racks.

Lay a piece of screen over the rack to get the right size.

Cut the aluminum screen to size using your metal snips.

Staple the screen onto each rack.

After you staple two sides, be sure to pull the screen tight like this as you staple.
Step 13 : Cut vent holes
Select 2 panels from the door, one at the base and one at the top. Remove the panels, screw part 15 (part 15 – Vent covers 2 pieces @ 18” to 24”) to the face and drill holes using a hole saw. Make sure to leave enough space between the holes that they will be able to be closed off. Remove screws and build a brace to hold part 15 in place.


Step 14 : Line inside with foil
Line the interior of the smoke house with heavy duty tin foil. Make the structure as air tight as you can. Expect to use 2 to 3 rolls of foil. Use a staple gun to secure the foil to the walls.
NOTE: do not use any galvanized metal in the smoke house as it is toxic.

Line the entire inside of the smoker with heavy duty tin foil. Secure foil with your staple gun.

Insert your racks into the smoker.
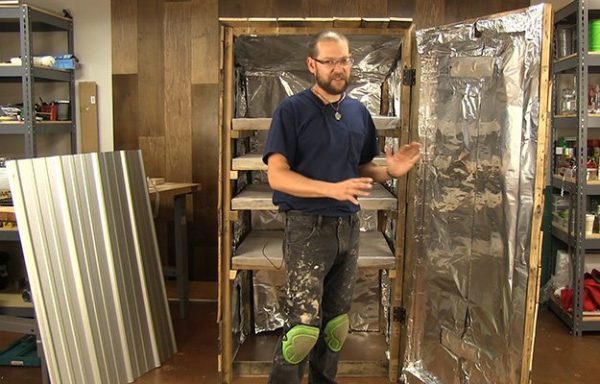
Just imagine what you can smoke in here.
Step 15 : Attach tin roof
Attach tin to roof and secure with screws.

Your cut piece of tin should fit nicely on the roof. Secure it with screws.
Step 16 : Admire your finished smoker
Your DIY smoker is complete and ready to smoke meat!

Your DIY Smoker is complete and ready to smoke meat.
Be sure to check out our step by step project videos:
How To Build a DIY Smoker: Part One
How To Build a DIY Smoker: Part Two
How To Build a DIY Smoker: Part Three

No comments:
Post a Comment